Category: Construction Progress

  • BIG DAY…IT ROLLS!

    Hi there, Everybody! It Rolls! yeah! ok-ok enough…

    I am very tired, I stayed up till three last night working on steering arms etc, and I don’t have the energy to caption all the pictures: So here is a brief overview caption…

    there are pictures of parts provided by Greasecar to convert the ‘POD to be able to run on veggy oil, or 100% biodiesel all winter (thanks Greasecar!) and a picture of the wire harness provided by Rebel Wire (Thanks Rebel Wire)…look on the links page for their links…and there are some pictures of the steering wheel “frame” getting machined…will have a wood core around the rim…and wrapped with leather…it’s 10-1/2″ in Dia, and then the pictures I have been waiting for for more than a year…It rolls…That’s Leilani, my daughter in the yellow hoody and that’s our “big” car the VW New Beetle!  Then there are some pictures of the ‘Pod next to my friend Bob’s Miata…the Miata is pretty big too!  Then that’s My partner Susan, and My freind Bob taking a ride in the ‘Pod…I am very happy So far, most everything is working like I thought it would!  Hopefully I will come back and fix this post a bit when I am not quite so tired!
    I also just added this Youtube video of the ‘POD in action!

    Thanks for looking...Roo


    [nggallery id=3]

  • Seats/rear swingarm/rear hub/sprocket etc

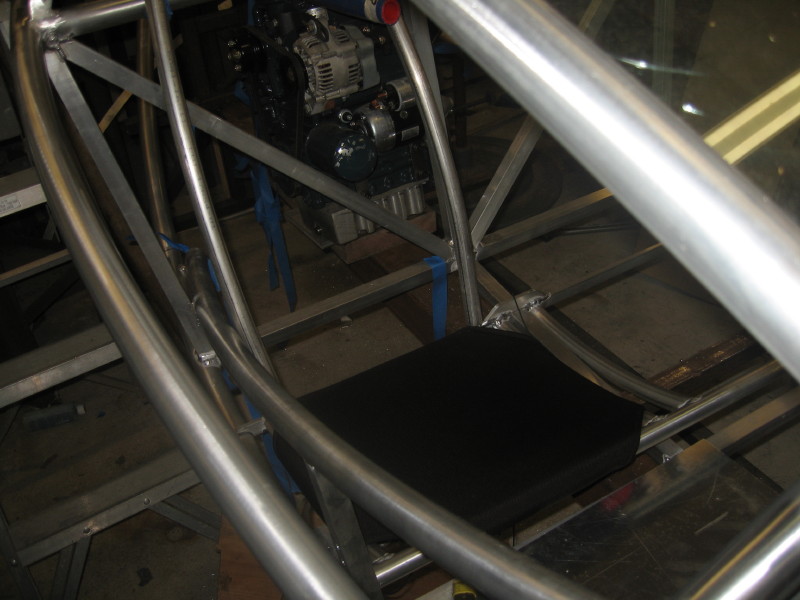
    Should the caption go at the top…well that’s how it’s to be…Here are the seat bottom frames, they are 1″-.065 6061 and they come out, so if I decide they are not the most comfy, I can change them!

    img_5402

     The backs will look something like this, they will stop just above that horizontal tube…they will get a little bend just at “lumbar” height for good back support…I hope…also they will pivot forward (there is a little space back there for stuff)

    img_5399

    Here is a seat bottom in place it is 1000 deneir “ballistic” nylon with two layers of neoprene wetsuit material under it to pad the tubes…it is laced tightly across the back (sorry I forgot to take that pic) and from what I can tell so far pretty comfy…the seat backs will be made the same way, but they hopefully will be a heavy mesh to keep the back cool…

    img_5403

    I like the corner detail…plus it was the easiest way to have the fabric fit the frame…

    img_5405

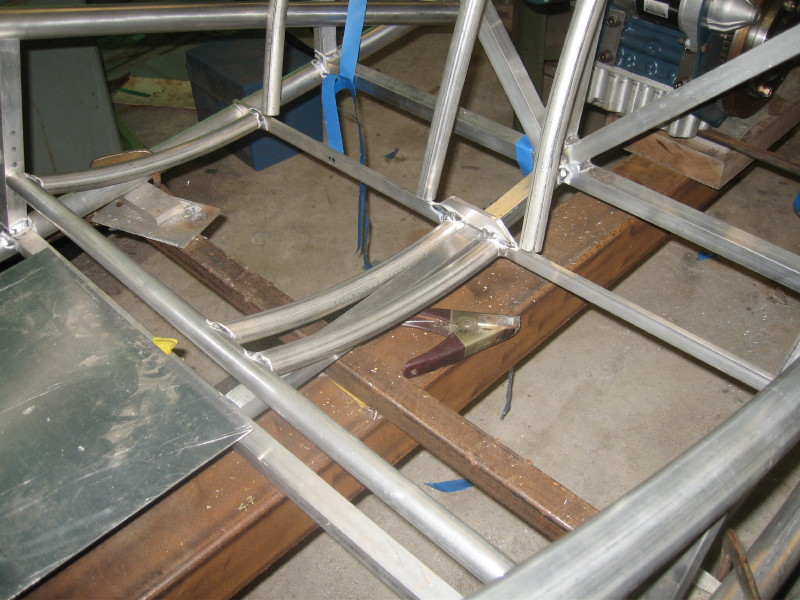
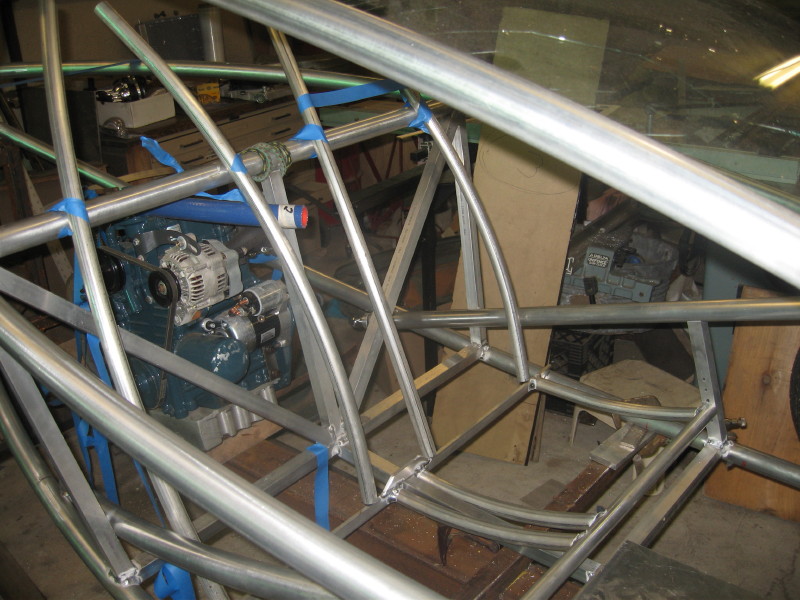
    OK…here is the rear swingarm, sorry the pics are a bit jumbled…but this is a overall view…please note that this is not the complete structure, there is a sort of “kinpost” triangulation going to happen around the engine and wheel…wait and see…

    img_5429

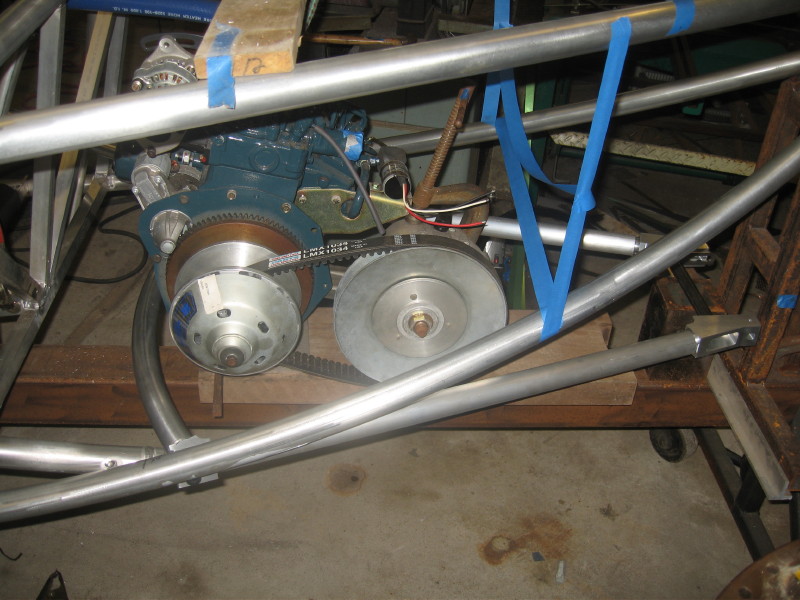
    This curved tube ties the front of the swingarm together, and prrovides for the forward anti vibration mounts for the engine…(yes the engine mounts to the swingarm…but it is centered over the pivot so there should be minimal engine unsprung weight issues… 

    img_5431

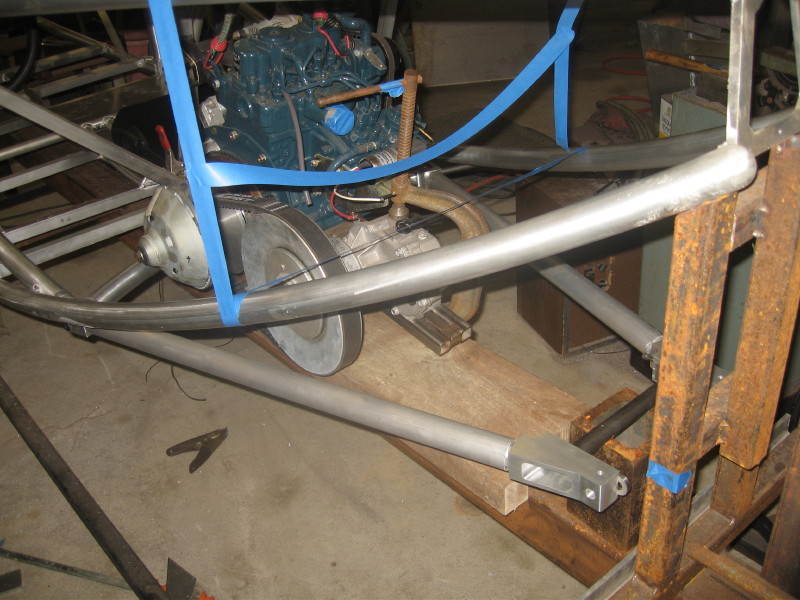
    rear view of the same…I have to add to my jig to provide a accurate location for the rear axle…

    img_5432

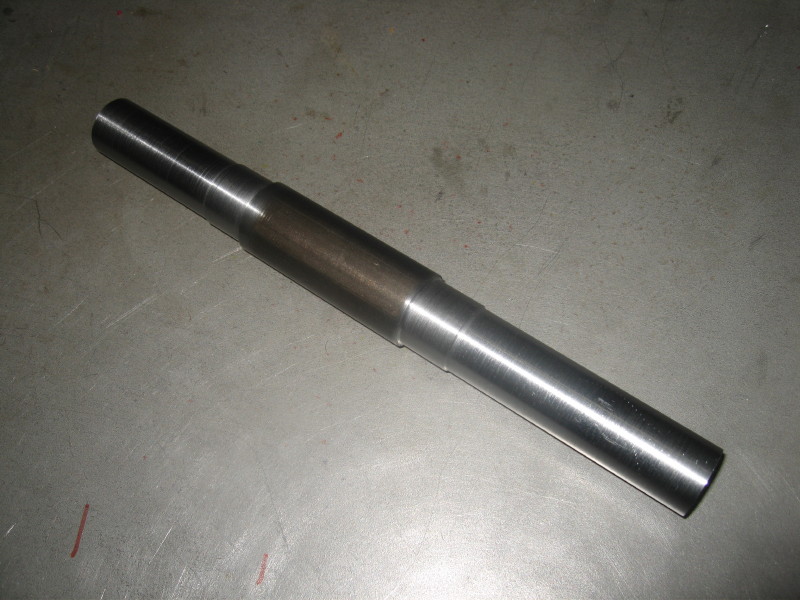
    here is the actual rear axle…it is machined out of a piece of high strength “stressproof” steel the big part goes between the bearings and locates the axle…

    img_5433

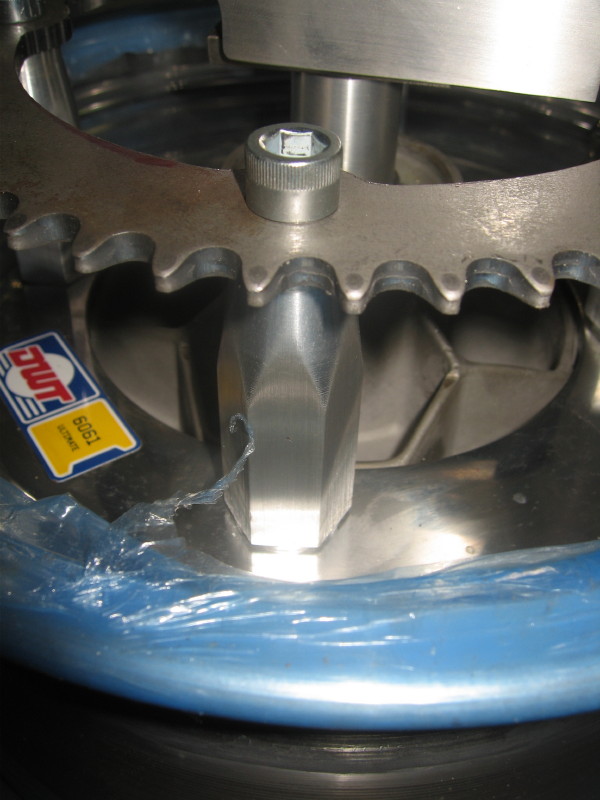
    Here is the rear wheel with hub, axle mount, and sprocket all mounted…note the hex “standoffs” that hold the sprocket, they screw onto the lugs from the hub in place of lug nuts…the sprocket is a standard 48 tooth sprocket with the new bolt circle drilled and the middle machined out…see sometimes I do machine steel…

    img_5435

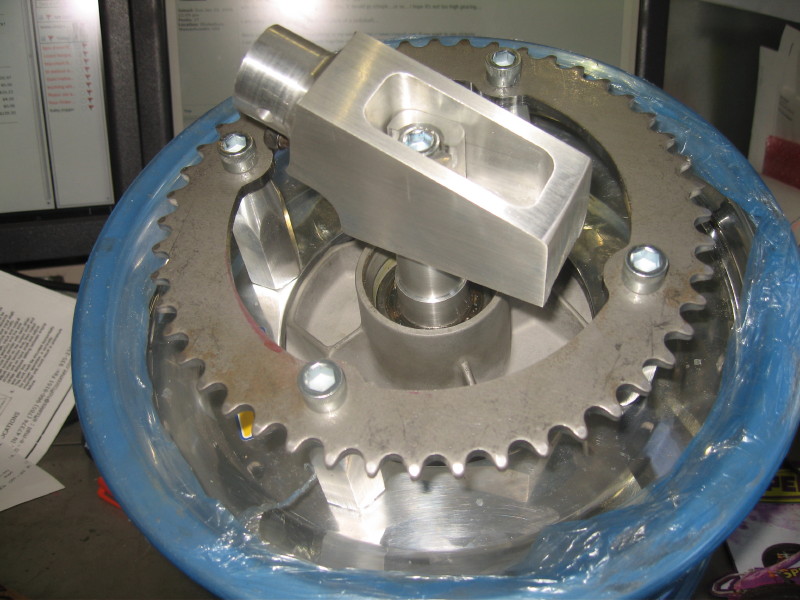
    a close-up of the sprocket….I probably could have used 5/16-24 sockethead cap screws here instead of the 3/8-24 one that i did…

    img_5436

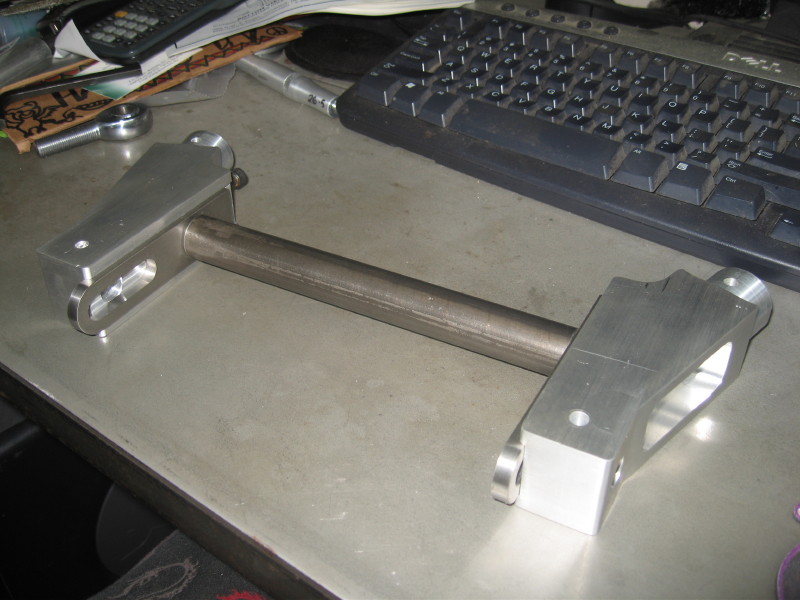
    here is the rear axle adjuster showing the screw head that will be drilled in three places for a cotter pin…

    img_5437

    here is the swingarm with the rear wheel mounted…the cross-tube is in place that holds the rear shock bottom and the motor rear anti-vibration mount…

    img_5443

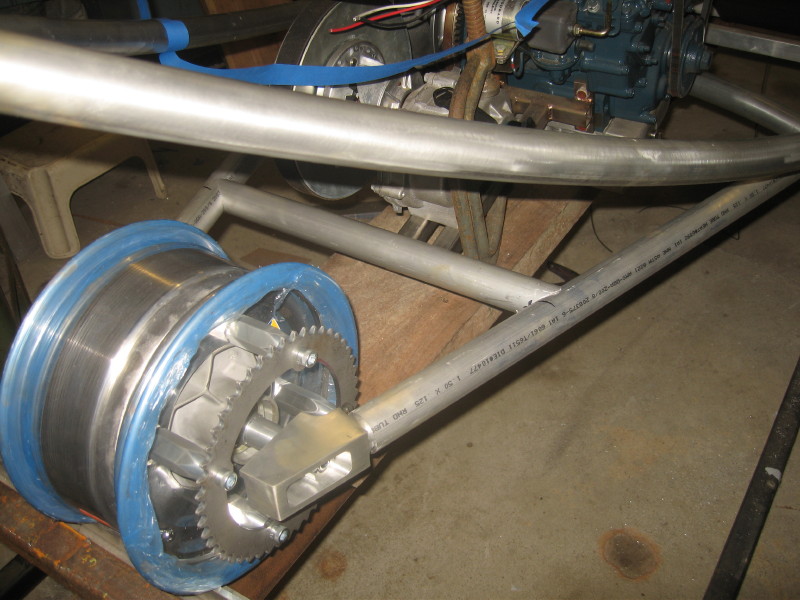
    the other side…the brake disk is visable…the caliper will be mounted on a bracket that rides on the rear axle and is anchored in that hole in the back of the axle adjuster…I found a nice caliper that has a combo hydro-and mechanical action, so I can use it for the regular brakes, and the emergency/parking brake….

    img_5444

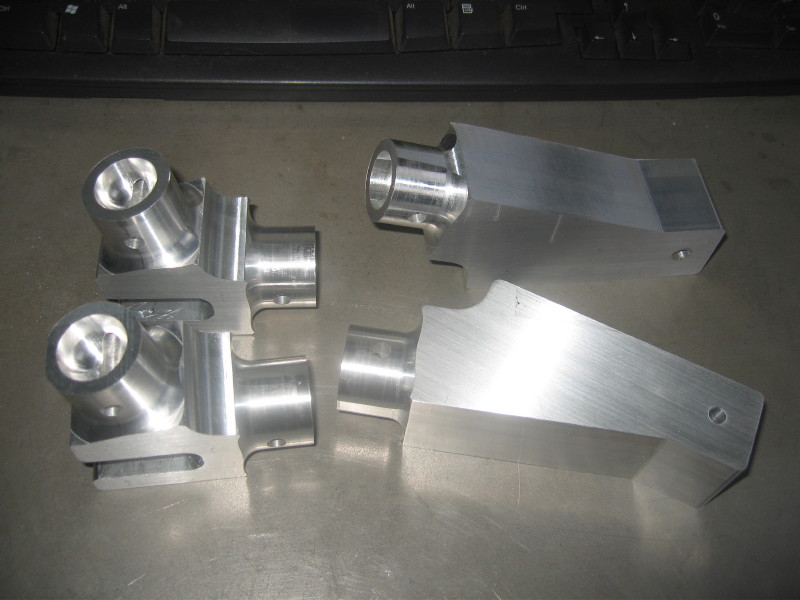
    some machining pics…these are the axle adjusters, and the swingarm pivots they took 12″ off my 4-1/2″ x 1-1/2″ 6061 bar!

    img_5409

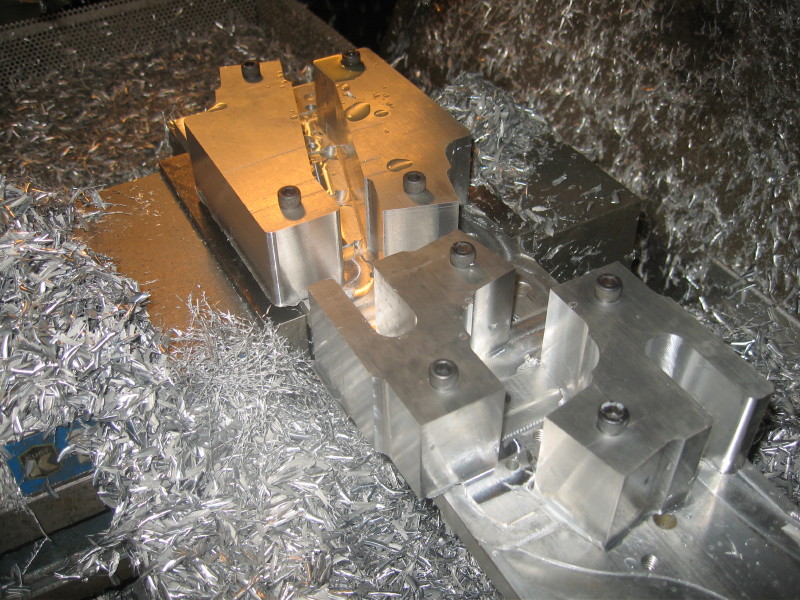
    each piece got a rounded end to go inside of the 1-1/2″ tube…I did this in the cnc with a ball end mill…so that there was a good bevel for the weld bead…

    img_5412

    the pivots showing the 1/2″ heim that is the pivot…

    img_5413

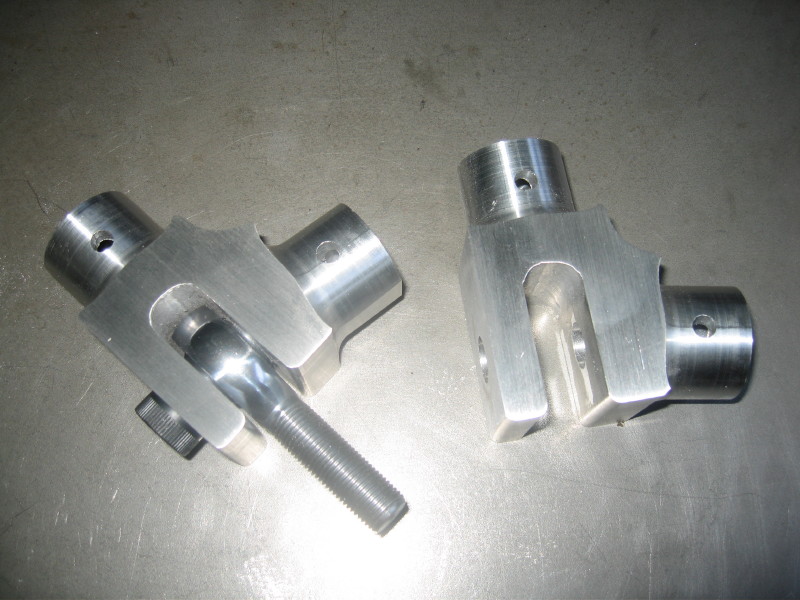
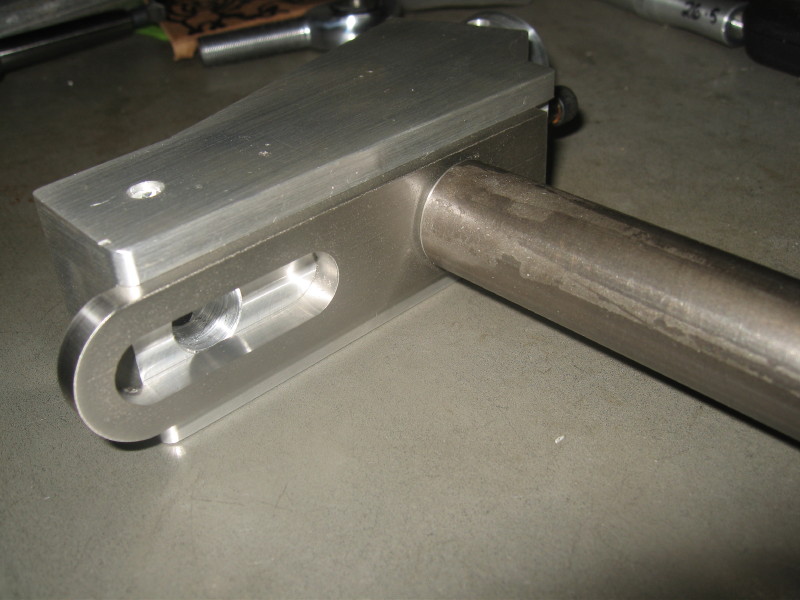
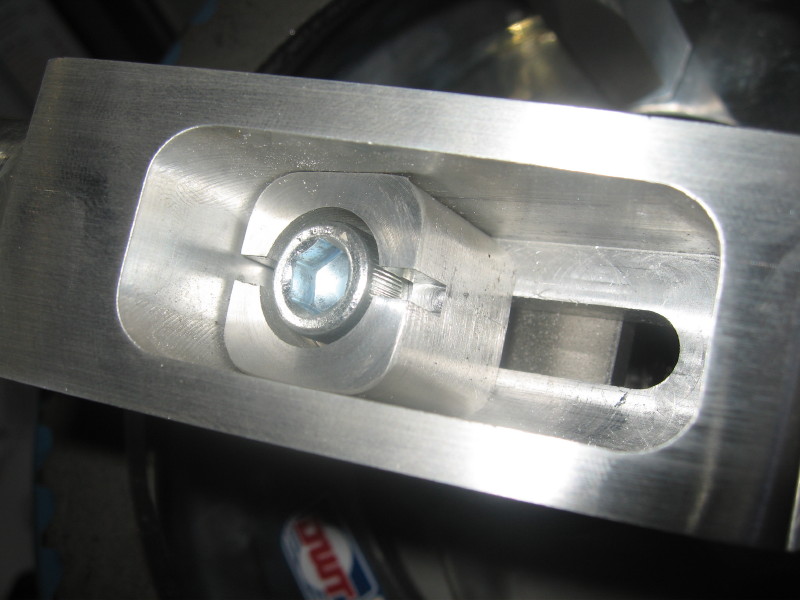
    the picture below shows the axle adjusters with the stainless plate that has a counterbore for the axle…I wanted to make sure that I had a good hard seat for the axle…thought the aluminum might be too soft there…the slot is so I can adjust the axle, and still mount the brake caliper in the right place…

    img_5421

    closeup…

    img_5422


  • LOWER A ARMS, REAR PIVOTS, FRONT WHEELS

    here is a pic of the lower a arms, or control arms…still on the milling machine..I am checking the fit of that radius-rod clevis in the picture..

    img_52241

    Here is a pic of the setup to bore the lower ball joint socket…I had to drag out the angle vise for this one! these arms were by the far the most complicated of the parts I have made so far…there were 6 different setups involved, 3d surfaces on two sides, and the angular setup you see here!

    img_5258

    the lower arms ready to have the ball joints pressed in! the relief on the inside is where the rubber boot of the shock goes..

    img_5259

    the setup for pressing in the ball joints…I was worried about getting the press fit right, but it fit just right…not to hard…not to easy!

    img_5267

    THE WHEELS ARE ON THE CAR!!! Finally, next will be to replace the blue tape and wire steering arms and tie rods!

    img_5276

    view from above…this is the view you will get when the car is off the jig, and on the ground, makes it look smaller!

    img_5279

    rear view…this shows what I call the “armrest tubes”, they are also the side impact door beams, and the bottom end is the mount for the 1/2″ heims for the rear swingarm pivots…I like the way they look…kinda wraps the dash around a bit…

    img_5277

    the front suspension…with the rack and pinion

    img_5252

    another view, I think that the “upright” looks a bit “clunky” compared to the upper and lower arms…The heims that are on in this pic are to be replaced with “high misalighnment” ones…the regular ones don’t quite have the travel they need…

    img_5251

    the air valve for the Harley shock…to fine tune the suspension spring rate…I had to make the upper arm wrap around the top of the shock, as the same shoulder bolt holds the upper shock mount, and the pivot for the upper control arm…

    img_5249

    img_5238

    you can see the bottom of the ball joint here…dont want to forget that locknut of the the clevis bolt!

    img_5236

    here is the upright turned as far as it can go…when the steering arm is in place it will not go quite that far…

    img_5234


    NEXT is the steering arms and tie rods, the the brakes!

  • Lots of frame progress!

    Hi there, lots of progress over the holiday!

    mostly on the front inner frame…

    the rack is mounted, the foot well is framed in, the pedal mount bar is there, and the “armrests” are installed, which also are the rear suspension pivot mount points, the radiator and battery locations are finalized. this all had to be planned with leaving room for the headlights, heater, fuse panel, hatch hinges and gas struts!  alot of stuff under the hood…and the motor is in the back!

    Susan gracefully getting in pre-hatch…we need to get that done soon…this is getting old!

    two of us in the ‘pod…hey how did Susan get to drive?

    img_5204

    slight fuzzy pic of all the progress note: Armrests, dash sides,foot well,rack mount,steering column and rear suspension pivot mounts.

    img_5170

    whoops! that wheel is not quite attached yet…

    img_5182

    self explanatory !

    img_5178

    all the framing in the front

    img_5172

    how the engine fits is the back…

    img_5188

  • TAGS!!!!

    NUMBER PLATES FOR ROOPOD!

    img_5168

    YEAH! we have our tags!

    they show that my vehicle is a 1980 kawaski KZ440…slightly modified

    now just somewhere to put that tag!

    Just had to post it…I am starting to get excited…I am insured and everthing!

  • Headlights and Upper “A” arms

    First, an apology for the format here, I am changing the site around, and instead of a big huge post for construction progress, each update will be it’s own post…and they will all be in the “construction progress” catogory…I will go back and change all the old updates soon…

    Sooo…Headlights…this is the first time I tried fitting the headlights into where they are to go on roopod…I   made the “8” shaped ring to hold them where they are supposed to go:  looks good so far…this is a high beam on…

    img_5077

    here you can see the “8” piece it holds the screws that are for aiming the headlights  (the ones with springs) blue tape, clamp and pine board are temporary…I promise…

    img_5079

    the lights are Hella projectors SW ES EB MG12 M60, 1KL 998.570-021 and each is 60 watts hb3 bulb. I don’t know if I will have the highs and lows both “on” as a option…hmm that’s alot of watts…240w 20 amps for my 30 amp alternator…hmm probably to much…so many questions…just to see the light..

    img_5080

    img_5081

    the whole headligh assembly will be under a sheet of lexan, and the “guts” will be exposed…so I tried to make it look cool…

    img_5084

    img_5083

    img_5085

    Here are the upper “A” arms being made…they came out of a 1.5″ X 4.5″ bar of 6061, and were a whole day’s work to get to this stage! more chips than part!  anyway, the remarkable thing about these are that the top and bottom of each part has a curved contour and it was done by using a 3-d toopath and a ball end mill…

    here is the 1/2″ ball end mill making a pass on the x/z axis, for speed, I made the passes .050″ each…leaves a a pattern, but I did not want to wait for a finer finish…

    img_5087

    more of the same…wish I had more coolant flow to wash away chips better…

    img_5088

    here are the parts with one side shaped with the ball end mill and turned over in the fixture, ready for side two…which will be the top…

    img_5089

    here are the parts finished…note the “tabs” between the forks and at the ends..these are just to hold the part for machining, and will be removed by hand…it’s hard to find a way to hold funny shaped parts like this…not much of that 14″ long bar of 1.5″ X 4.5″ alum!

    img_5092

    here is a video of the cnc doing a ball end mill toolpath…